ECM guide
In this guide, we will learn how to set up a self-maintaining playlist using Dispatcharr and Enhanced Channel Manager.
It is important to know that setting this up is going to require a decent amount of time and effort, especially if you want to set up complex auto-creation rules. But the end result is definitely worth it, since you will have a playlist that is always up to date and sorted according to your preferences, without the need for manual intervention when streams are replaced, added, removed or just blacked out by your providers.
Dispatcharr
Dispatcharr is a powerful open source tool that allows us to automate the management of our playlists. It can be configured to fetch new channels and EPG data from various sources, and then update our playlist accordingly. We can add multiple sources and create mutiple users with different permissions and max connections. When a stream buffers or provider max connections is reached, Dispatcharr will automatically pass through to the next available stream, ensuring a smooth streaming experience.
Setting up Dispatcharr is straightforward and done using docker containers. The instructions can be found in the installation docs.
More in depth documentation can be found in the Dispatcharr Docs
Enhanced Channel Manager
Introduction
Enhanced Channel Manager can be seen as a more user-friendly and feature-rich front-end over our Dispatcharr install. It also provides a few extra features such as auto-creation or auto-filling of channels and probe jobs to check quality and sort according to our predefined preferences.
Set-up
Simply follow the instructions in the github readme to get started.
Basic settings
The first thing we need to do is to connect our Dispatcharr instance. Go to the settings page and fill in the required information under the "Dispatcharr" section.
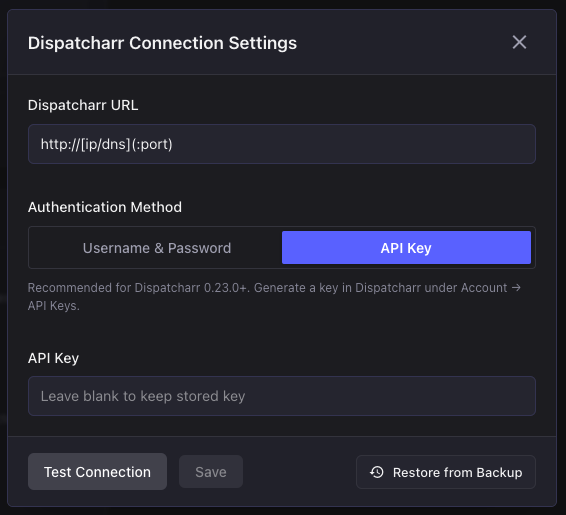
Enter wherever your Dispatcharr instance is hosted, along with the username and password or the API key.
We advise going through all the settings and adjusting them to your needs, but for the sake of this guide we will only cover the most relevant ones.
Channel defaults
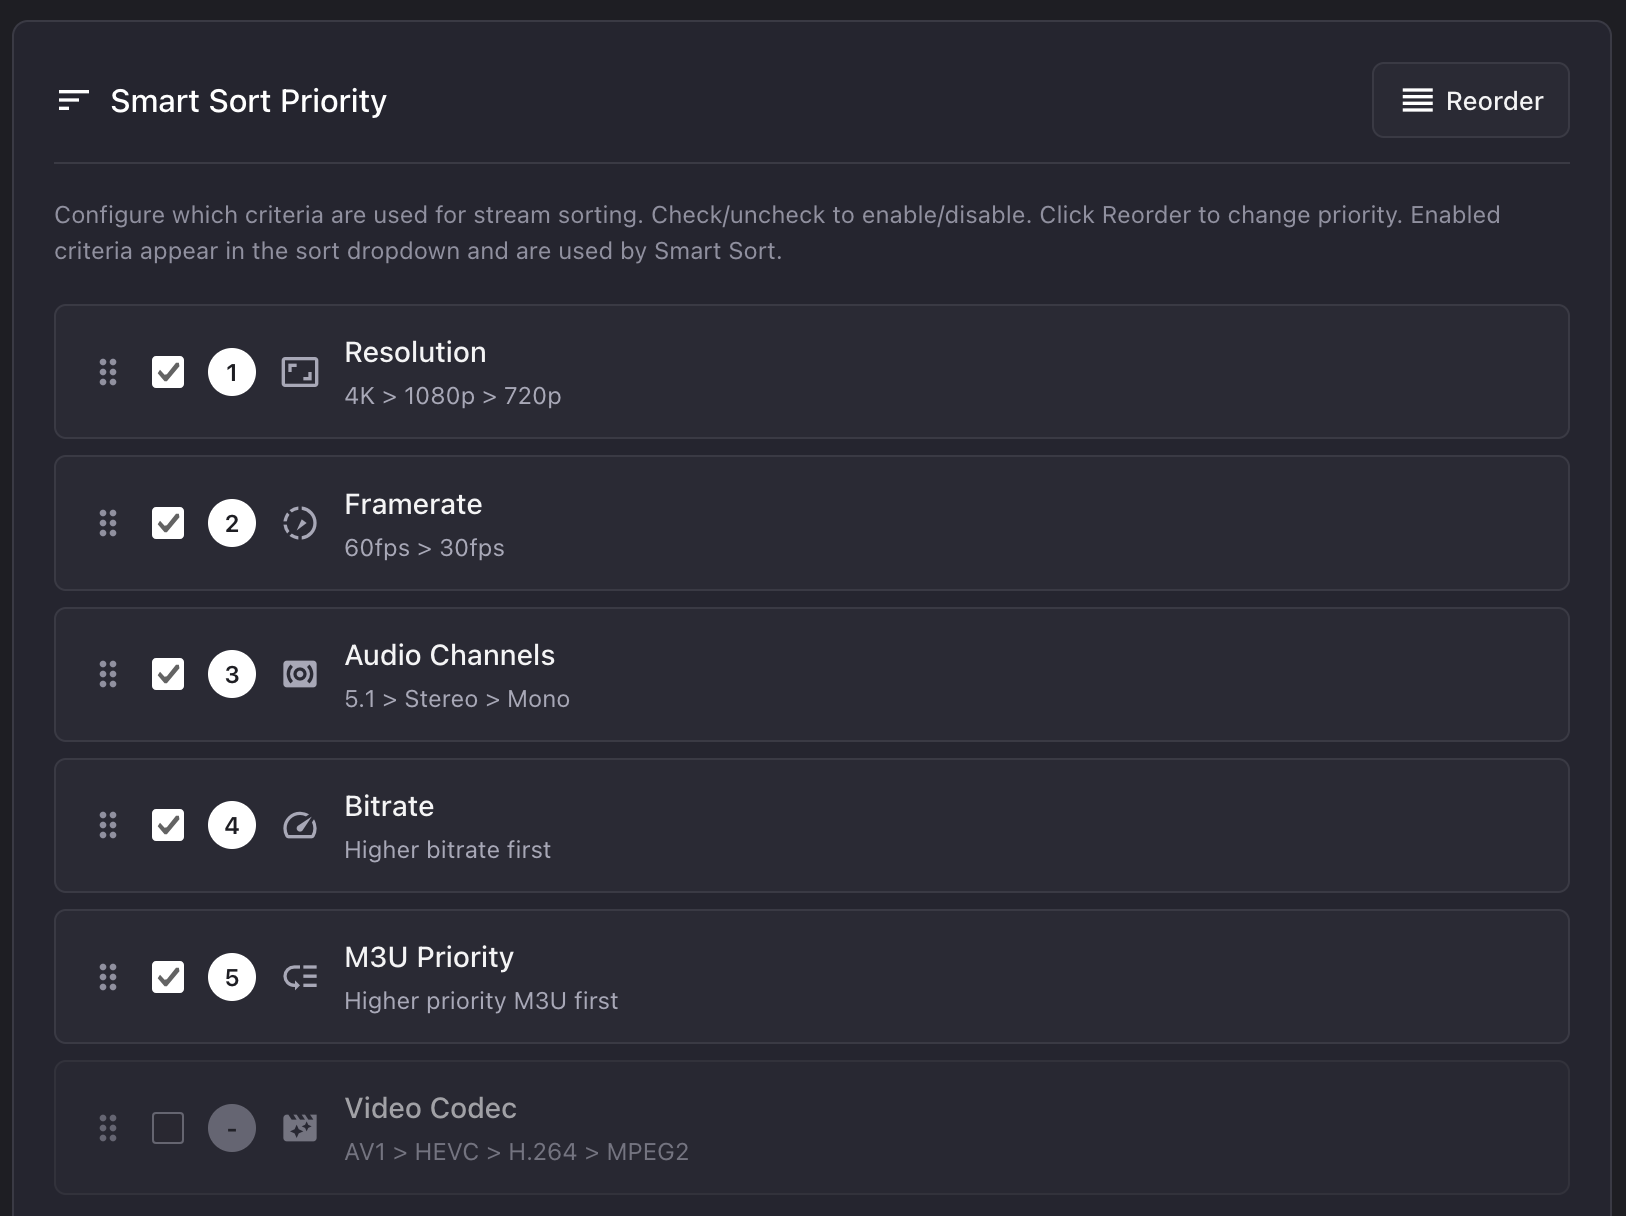
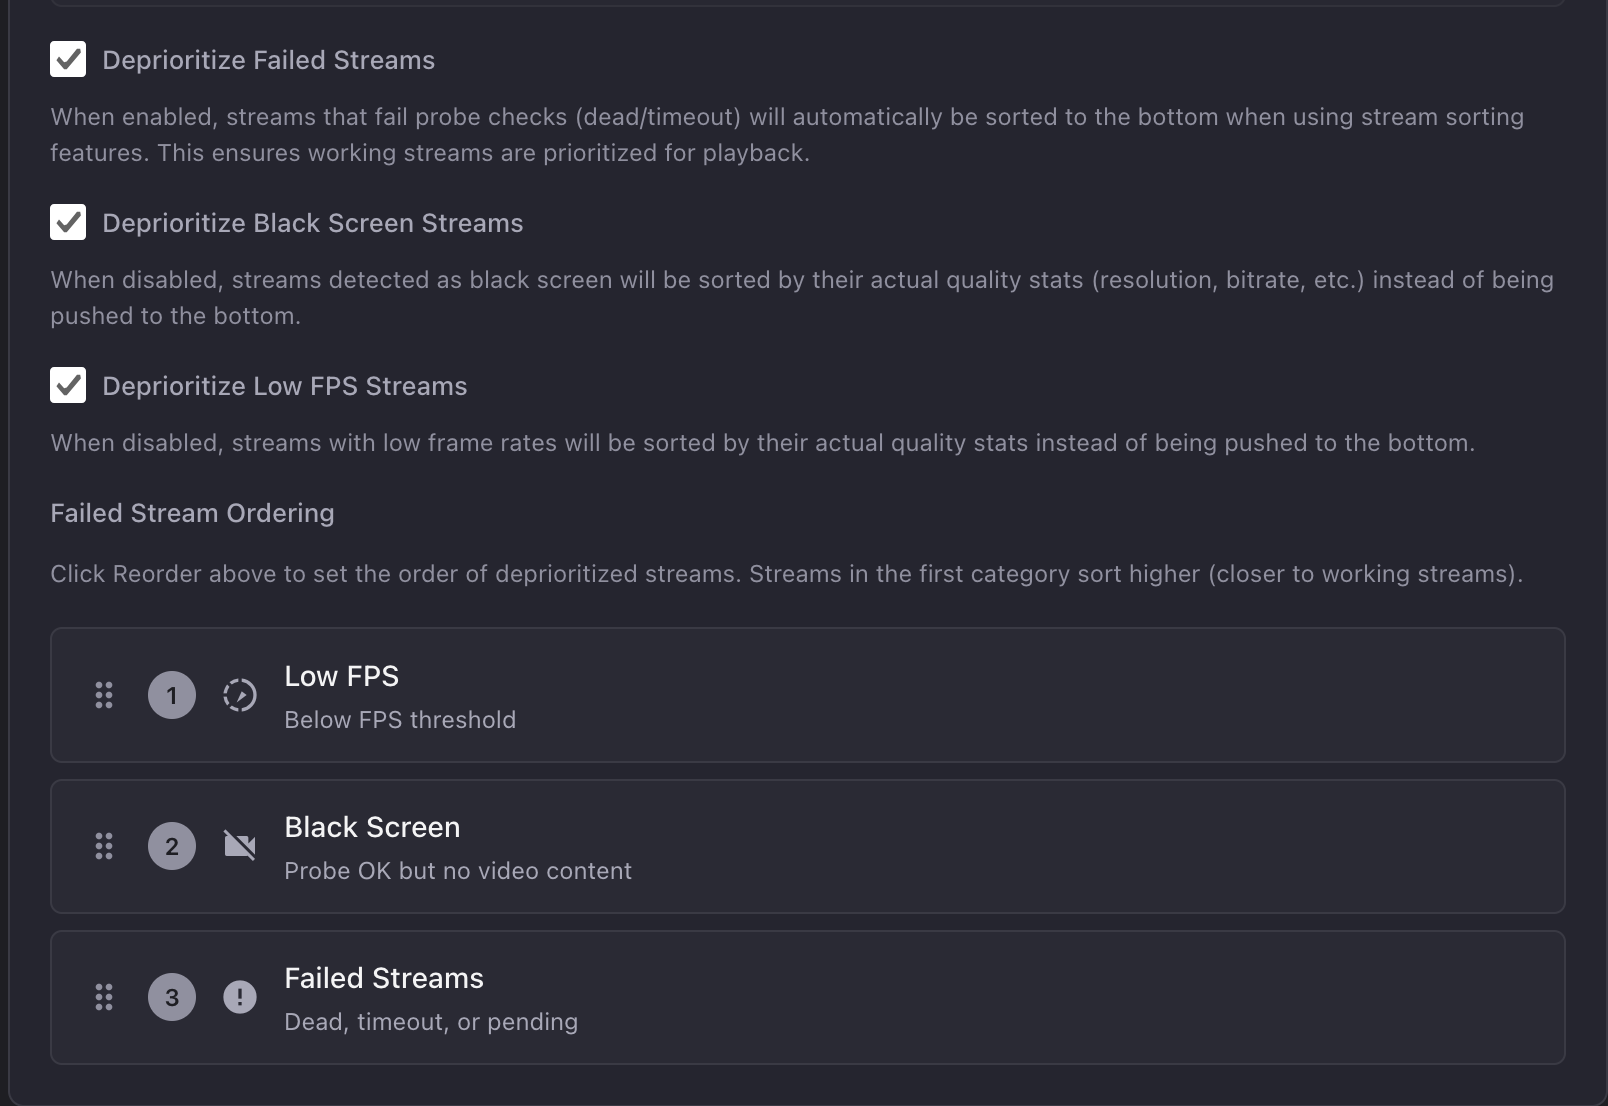
Crucial here is setting up how you want streams to be sorted when they are added to the playlist and when channels are being probed. This will ensure that you always get the best streams on top of your channels and pass through will trickle down to the next best streams.
Deprioritizing streams means pushing them to the bottom of the list. So streams temporarily unavailable will be deprioritized and can return after another probe job, if they become available again.
Scheduled tasks
Here you can set up how often and at which times you want to run your probe and auto-creation jobs.
We will get into the details of these jobs later on, but for now, the most important thing is the order in which the jobs run:
- Auto-creation job: this job will automatically create or fill up channels based on the streams that are added to your Dispatcharr instance.
- Probe job: this job will check the quality of the streams and sort them according to your predefined preferences. Make sure when you set up your probe jobs, that you don't probe ppv/event auto-sync groups, since they are dead unless an event is live.
- Reprobe failed streams: this job will check for streams that have failed the probe job and reprobe them to see if they have become available again.
- Struck stream cleanup: every time a stream is dead on a probe, it will get one strike. After a chosen amount of strikes, the stream will be removed from the channel. It can be picked up again on the next auto-creation job if you set it up to do so.
If you want to go through all these twice a week, an example schedule could be:
- Monday 1:00 AM: Auto-creation job
- Monday 3:00 AM: Probe job (after this job, your channels will be accurate and sorted according to your preferences)
- Tuesday 1:00 AM: Reprobe failed streams
- Tuesday 3:00 AM: Struck stream cleanup
- Thursday 1:00 AM: Auto-creation job
- Thursday 3:00 AM: Probe job (after this job, your channels will be accurate and sorted according to your preferences)
- Friday 1:00 AM: Reprobe failed streams
- Friday 3:00 AM: Struck stream cleanup
There are more scheduled tasks available that are probably daily jobs, such as EPG and M3U updates, set them up according to your needs.
Maintenance
Here we can set up the strike threshold for stream cleanup we talked about earlier, as well as our probe job settings.
Probe settings are pretty self-explanatory, but here is some insight on the most important ones:
- Timeout: shorten if your job is taking too long.
- Stream fetch page limit: raise the default if you have more than 100k streams to probe.
- Enable parallel probing: checking this will significantly speed up the process if you have more than one m3u source.
- Max concurrent probes: important to set this to the lowest max_streams value of your m3u's to avoid rate limiting.
- Auto-reorder streams after probe: this will automatically reorder your channels according to your presets in the channel defaults after every probe job, ensuring you always have the best streams on top.
- Black screen detection: check this to enable the black screen scan and push those to the bottom of the channels.
M3U Manager
This is the main entry point for the content. Here you can add your m3u sources and manage them.
Just click on "Add M3U source" and fill in the provider creds.
Optionally, add a priority to the sources if you have multiple sources and want to prioritize streams on the provider parameter. Highest numbers will be prioritized.
Auto-Sync Groups
When you click on the folder icon next to your m3u source, you can manage the groups for that source. Here you can set up auto-sync groups, which will automatically create channels based on the streams in that group. This is especially useful for PPV/Event groups.

Just enable auto-sync, pick a start channel number for the group in your playlist and click the settings icon. Here you can define custom dummy EPG rules or channel logo's if you want. More later on the dummy EPG rules.
EPG Manager
This is where you can manage your EPG sources and set up your dummy EPG rules.
Sources
Load up your EPG sources, just like you did with your m3u sources in the M3U manager.
An excellent source for EPG data is the late jesmann's epg project, which provides EPG data for a wide range of channels and is regularly updated by the community.
Just add a source, add the XML link and save.
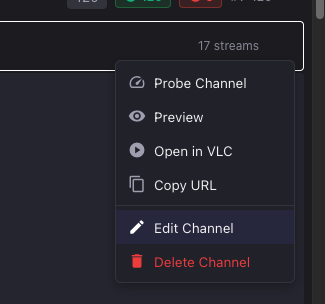
From that moment on, you can just click "Edit mode" in the Channel Manager and add EPG data to your channels by clicking on the 3 dots and then edit channel. Under EPG data, you just start typing in the box and pick the correct EPG source (or set up auto-assign rules).
Dummy EPG
Dummy EPG is a great feature that allows you to set up rules to automatically assign EPG data to channels that don't have any. So instead of having just updated channel names in the EPG for those channels, you can have a full EPG with program names and descriptions and you can show the actual block when the program is live, which is useful for recording and for a better experience in your EPG guide.
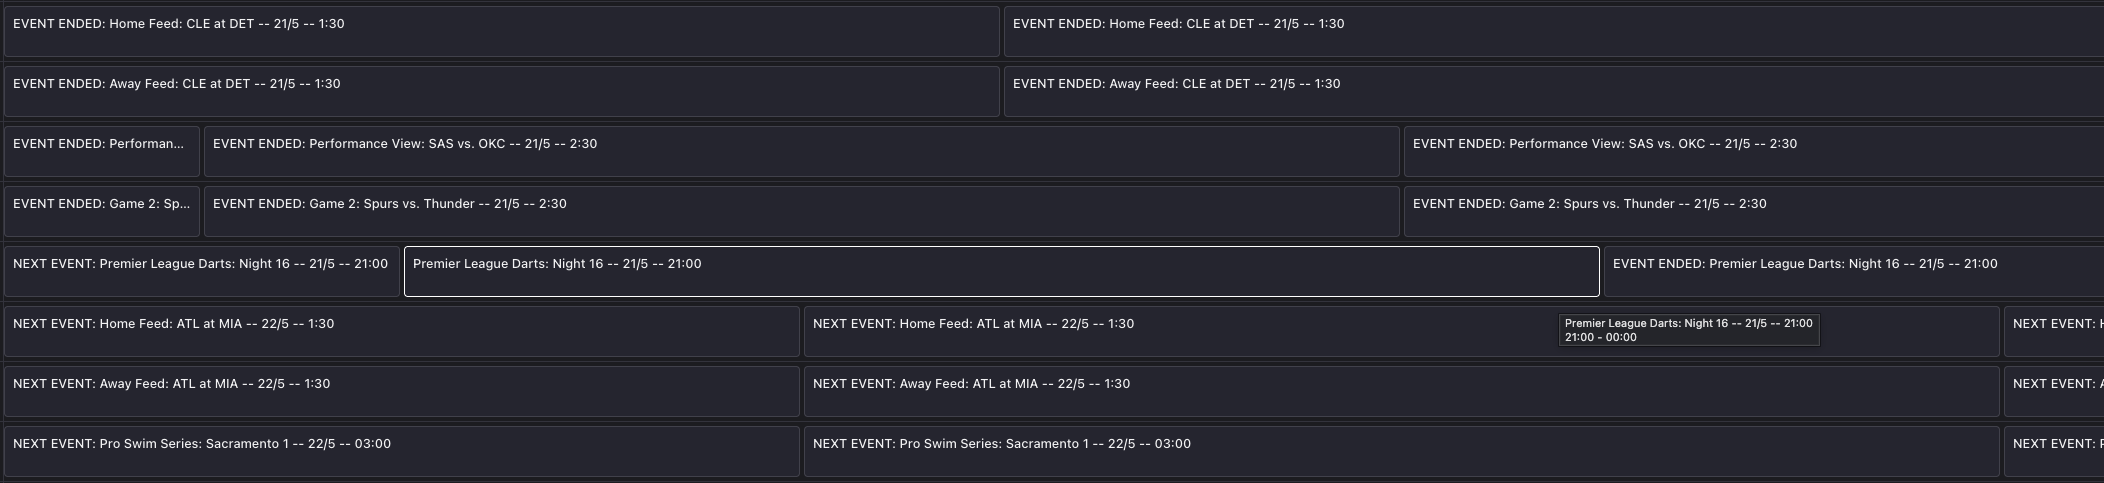
You can and maybe should handle these directly in Dispatcharr since the options to add upcoming and past events are more limited in ECM. But for the sake of this guide, we will show you how to set up a dummy EPG rule in ECM.
An example of a dummy EPG rule could be:
- Add dummy EPG
- Select stream name as Name Source
- Scroll all the way to the bottom and enter a stream name from that group in the Sample Channel Name field
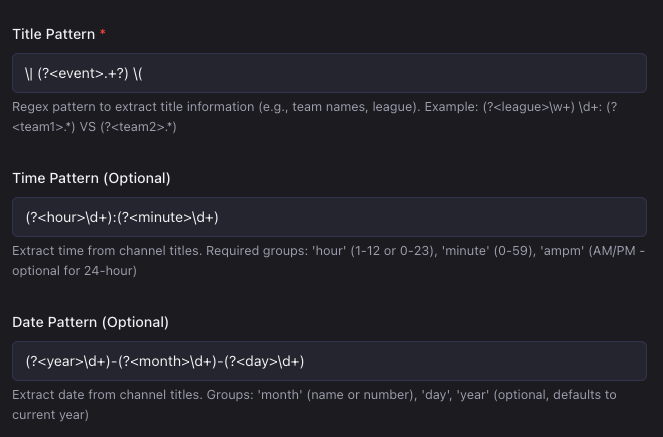
- In the pattern configuration, add some regex rules to extract the event name, the time and the date:
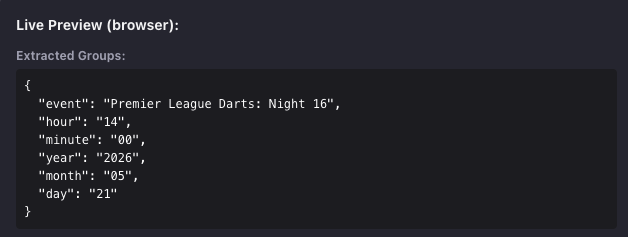
- Scroll to the bottom and check the extractions:
- Set up the output templates just like you want them.
Auto-Creation
Here we can set up our auto-creation rules, which will automatically create or fill up channels. So when a new stream for our favorite channel is added to one of our m3u sources, it will automatically be added to the correct channel in our playlist.
Settings for these rules are pretty self-explanatory, set them up according to your needs.
Let's focus on a simple example rule to pull streams and push them to a channel:
- name: CANVAS
  description: null
  enabled: true
  priority: 1
  m3u_account_id: null
  m3u_account_name: null
  target_group_id: null
  target_group_name: null
  conditions:
    - type: stream_name_matches
      value: (?i)\bcanvas\b
      connector: and
      actions:
    - type: merge_streams
      target: existing_channel
      find_channel_by: name_exact
      find_channel_value: CANVAS
      run_on_refresh: false
      stop_on_first_match: true
      sort_field: quality
      sort_order: desc
      sort_regex: null
      stream_sort_field: smart_sort
      stream_sort_order: asc
      quality_tie_break_order: desc
      quality_m3u_tie_break_enabled: true
      normalization_group_ids: []
      skip_struck_streams: false
      probe_on_sort: true
      orphan_action: delete
      match_scope_target_group: false
This channel name is very straightforward and specific, so it will be enough to make sure only correct streams for this channel will be merged.
This next example gets a bit more complex, since versions of this channel name are just the word "EEN". That's "AN" in Dutch, so it matches a bunch of other channel names containing that word.
- name: VRT 1
  description: null
  enabled: true
  priority: 0
  m3u_account_id: null
  m3u_account_name: null
  target_group_id: null
  target_group_name: null
  conditions:
    - type: stream_name_matches
      value: (?i)(vrt[\s._:-]*1|vrt[\s._:-]*een|(?:^|.*?[\[(]?(?:NL|BE|4K|8K|16K\+?)\]?[\s|:._-]+)een\b)
      connector: and
      actions:
    - type: merge_streams
      target: existing_channel
      find_channel_by: name_exact
      find_channel_value: VRT 1
      run_on_refresh: false
      stop_on_first_match: true
      sort_field: quality
      sort_order: desc
      sort_regex: null
      stream_sort_field: smart_sort
      stream_sort_order: asc
      quality_tie_break_order: desc
      quality_m3u_tie_break_enabled: true
      normalization_group_ids: []
      skip_struck_streams: false
      probe_on_sort: true
      orphan_action: delete
      match_scope_target_group: false
Let's break down the regex.
The pattern has 3 alternatives separated by |:
(?i)(vrt[\s._:-]*1|vrt[\s._:-]*een|(?:^|.*?[\[(]?(?:NL|BE|4K|8K|16K\+?)\]?[\s|:._-]+)een\b)
(?i) — case-insensitive flag, so VRT, vrt, Vrt all match.
Alternative 1 — vrt[\s._:-]*1
Matches VRT 1 with any separator (space, dot, dash, underscore, colon) or none.
VRT1 · VRT 1 · VRT-1 · VRT.1
Alternative 2 — vrt[\s._:-]*een
Same as above but for the EEN suffix.
VRT EEN · VRTTEEN · VRT-EEN · vrt.een
Alternative 3 — (?:^|.*?[\[(]?(?:NL|BE|4K|8K|16K\+?)\]?[\s|:._-]+)een\b
Matches standalone EEN, but only at the start of the string or after a recognised prefix (country code or quality tag). The \b word boundary prevents matching EEN inside other words.
✅ EEN · [BE] EEN UHD · NL: Een · 8K | EEN · [NL] EEN HD
❌ PRAATJE MET EEN MAATJE · OH WAT EEN JAAR HD
As you can see, this pattern is becoming more specific and introduces limitations on prefix strings. You have a bunch of other conditions you can add in a rule like this and mix and match them with "and" or "or" connectors, to achieve a similar result.
In the end it's about finding the right balance between specificity and generality. The perfect rule does not need tweaking when you add a new m3u source, but it should also not merge incorrect streams.
Usage of an LLM can be a real timesaver here. There is also the possibility to enable the MCP integration inside ECM and use that to generate and finetune these rules.
Probe Jobs
The channel probe jobs are especially useful to keep our channels up to date and sorted according to our preferences.
We actually set these in the Maintenance settings and we schedule them in the Scheduled tasks. That's it.
When you have a random issue in between probe jobs, you can just run one manually from the "Run probe job" button in the channel manager. You can do this for a specific channel or group.
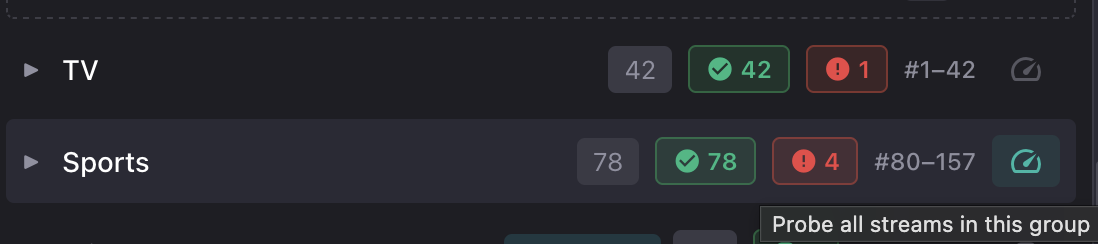
Conclusion
There you go. The basics of setting up a self-maintaining playlist using Dispatcharr and Enhanced Channel Manager. New streams for your favourtite channels will automatically be added and every non PPV/Event channel will be periodically re-sorted according to your preferences.